Adding an Event Image
Add a banner so members can recognise the event quickly. The image appears as BANNER on the Events list and in LIVE PREVIEW.
Why Artwork Helps
A clear photo of the activity — a workshop, a challenge week, a themed session — helps members tell events apart. HIIT Blast uses a gym photo as the banner.
Where the Image Appears
- The BANNER column on Studio → Manage Events → Event
- Event Banner on Edit Event
- LIVE PREVIEW on Basics and Review
Exact member-app placement is not confirmed. There is no mobile-app guide in this help centre yet.
Workflow — Add Event Artwork
Event → Edit → Upload/Select Image → Zoom and reposition → Save image
Step 1 — Open the event
Open Studio → Manage Events → Event, then Edit Event.
Step 2 — Open the banner editor
Use the Event Banner control on Basics. The modal title is Update Event Banner. The instruction is: Upload an image, then zoom and reposition it inside the frame.
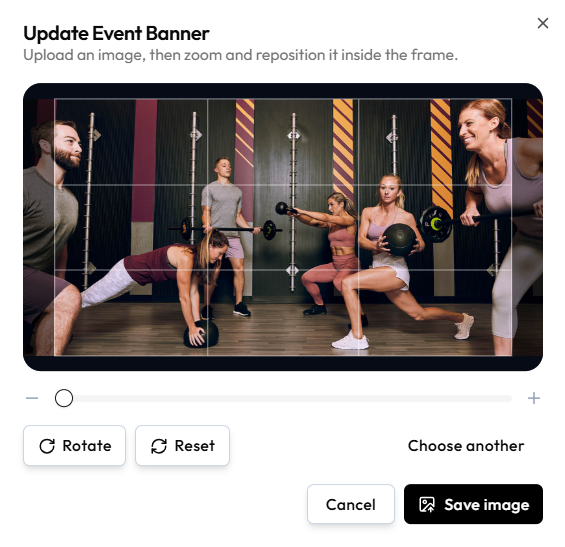
Step 3 — Adjust the image
| Control | What it does |
|---|---|
| Zoom slider | - and + to zoom inside the frame |
| Crop grid | A 3×3 overlay. Dimmed areas sit outside the frame |
| Rotate | Rotates the image |
| Reset | Reverts the crop and zoom |
| Choose another | Pick a different file |
No pixel size or file-type limits are shown on this modal.
Step 4 — Save
Click Save image, or Cancel / X to close without saving.
Step 5 — Continue the event
Click Continue to Review, then Update Event so the list thumbnail updates.
Replacing an Image
Open Update Event Banner again and use Choose another, then Save image.
Create Event can show a placeholder in Live Preview before a banner is uploaded. The captured upload flow is on Edit Event.