Add a Team Member
Add a staff account so someone on your team can sign in. You can send an email invite, or create the account yourself and set a password.
Before You Start
- Know the person’s name and email.
- Know which User Type they should have. You select User Type first; then you can select Role.
Choose How to Add Them
Click + Add Member on the Members page.
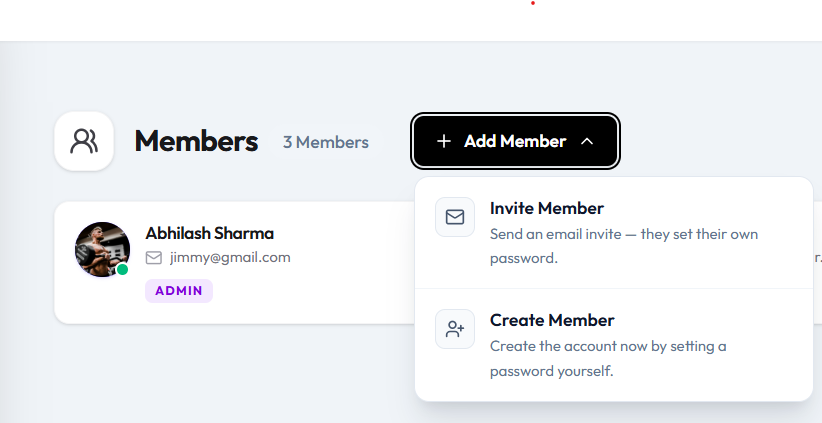
| Option | What it does |
|---|---|
| Invite Member | Send an email invite — they set their own password. |
| Create Member | Create the account now by setting a password yourself. |
Invite Member
Use invite when the person should finish setup themselves.
Step 1 — Open Invite Member
On People → Members, click + Add Member, then Invite Member.
The window title is Invite a new member. The helper text is: Fill in the details below to invite a member to your team.
Step 2 — Enter personal details
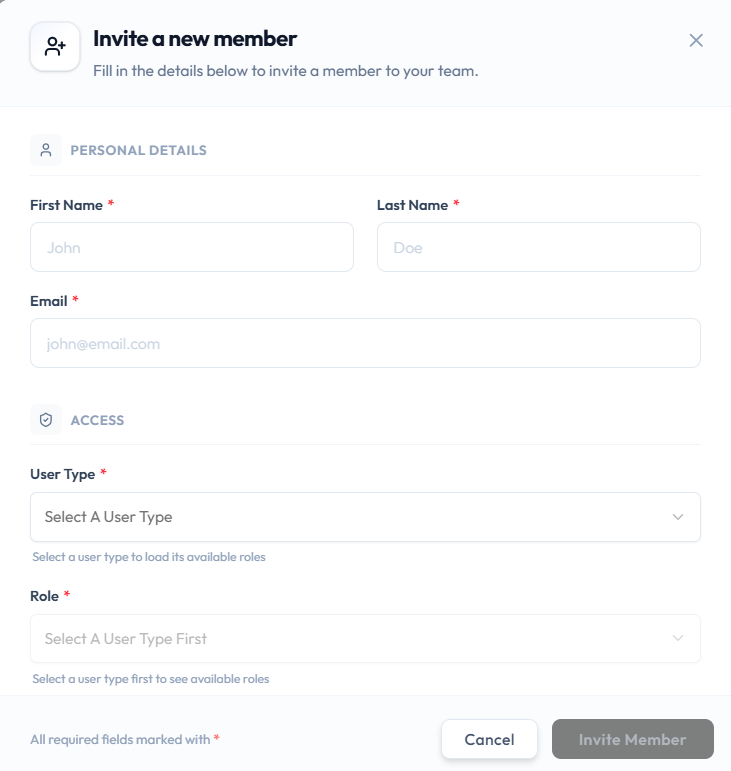
Under PERSONAL DETAILS, complete the required fields (marked with *):
- First Name
- Last Name
The footer says: All required fields marked with *.
Step 3 — Choose access
Under ACCESS:
- Open User Type (required). The helper text is: Select a user type to load its available roles. Until you choose a type, the field shows Select A User Type.
- Then choose Role (required). Until a user type is selected, Role shows Select A User Type First, with the helper: Select a user type first to see available roles.
Invite Member stays unavailable until the required fields are filled. Cancel or the X closes the window without inviting.
Create Member
Use create when you want the account ready immediately, without an invitation email.
Step 1 — Open Create Member
On People → Members, click + Add Member, then Create Member.
The window title is Create a new member. The helper text is: Create the account directly by setting a password — no invitation email is sent.
Step 2 — Enter personal details and access
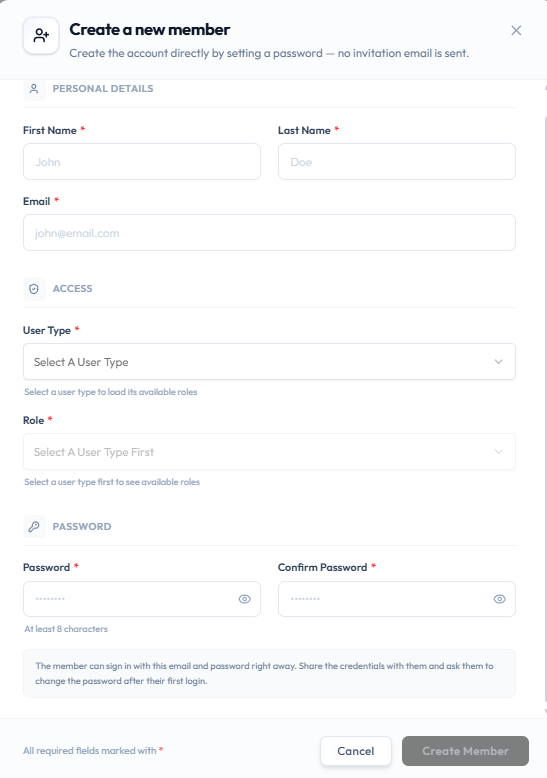
Under PERSONAL DETAILS, complete First Name, Last Name, and Email (all required).
Under ACCESS, choose User Type first, then Role. See Roles.
Until you pick a user type:
- User Type shows Select A User Type
- Role shows Select A User Type First
- Role helper: Select a user type first to see available roles
Step 3 — Set a password
Under PASSWORD:
- Password (required) — helper: At least 8 characters. Use the eye icon to show or hide the password.
- Confirm Password (required) — use the eye icon to show or hide it.
The form also shows: The member can sign in with this email and password right away. Share the credentials with them and ask them to change the password after their first login.
Create Member stays unavailable until the required fields are filled. Cancel or the X closes the window without creating the account.
After Adding
A new team member appears on the Members list with their name, email, and role.