Add a Location
Use this to add a new physical site for your business, such as another studio or branch.
Before You Start
- Know the place you want to add, so you can search for it or find it on the map.
- You need access to the Fitnez Studio dashboard header. Adding a location starts from SELECT LOCATION, not from the left-hand menu.
Adding a location is a multi-step process. The first step is Select Location. After that you continue to Review.
Steps
Step 1 — Open the location selector
In the top-right header, click the location name next to the map pin.
The SELECT LOCATION menu opens.
Step 2 — Choose Add New Location
At the bottom of the menu, click + Add New Location.
This opens the Add New Location window.
Step 3 — Select the place on the map
The first step is labelled 1 Select Location.
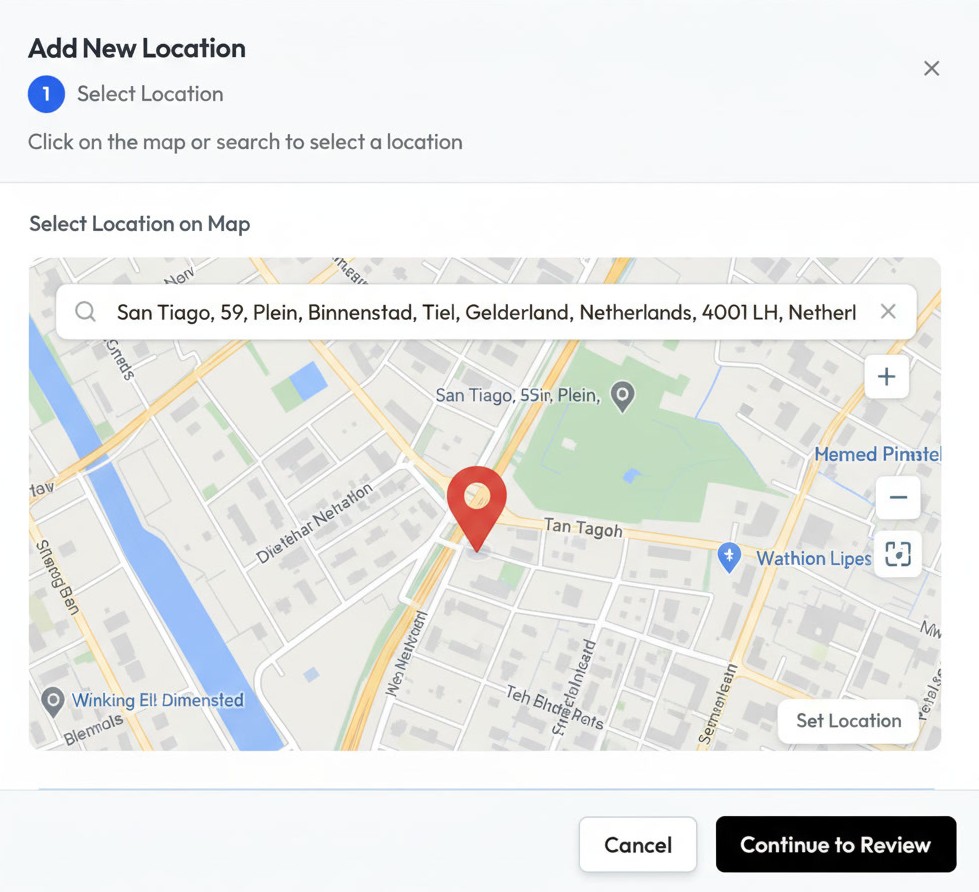
On this screen:
- The title is Add New Location.
- The instruction is Click on the map or search to select a location.
- Use Search for a location… to find a place by name.
- Or click the map. The helper on the map says Click on the map to set location.
- A pin marks the selected point.
- Cancel or the X closes the window without adding the location.
- Continue to Review stays unavailable until a location is selected.
Search or click the map so the pin is on the correct site, then click Continue to Review.
Step 4 — Confirm the location was added
After you finish adding the location, open SELECT LOCATION again. The new site appears in the list with its name and place label.

The checkmark marks the location you are currently using. Click another row to switch to that site.
After Selecting a Location
When a place is selected on the map, Continue to Review becomes available so you can check the location before finishing.
After the location is added, it is listed in SELECT LOCATION. Click the current location name in the header to see every site and switch between them.