Create a Client Group
Create a group when you want a reusable label for a set of clients — for example Beginners or Corporate account.
Before You Start
- Decide the group name staff will recognise.
- Decide the colour staff should look for on Manage Groups.
Steps
Step 1 — Open Manage Groups
Open People → Clients, then click Manage group.
Step 2 — Click Add Group
Click + Add Group.
The window title is Add Client Group.
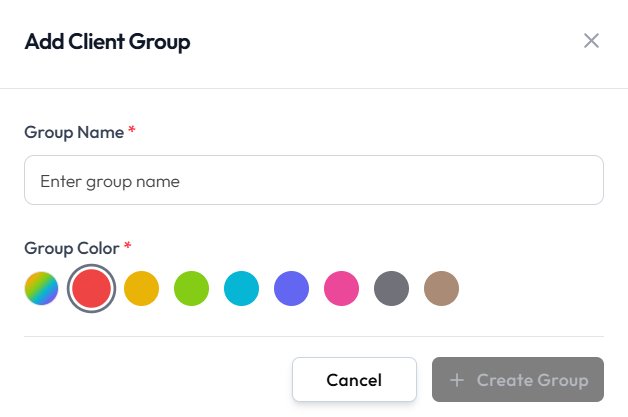
Step 3 — Enter the group name
Group Name is required. Use a name staff will recognise, such as Beginners.
Step 4 — Choose a colour
Group Color is required. Click one of the colour circles. The selected colour has a ring around it.
Colour is for recognition on the group list. See Group Colours.
Step 5 — Create the group
- + Create Group saves the group.
- Cancel or the X closes the window without creating it.
Create Group stays unavailable until the required fields are filled.
After Saving
The new group appears on Manage Groups with its name and colour. You can then assign clients to it.
Related Articles
Last updated on